DIY climbing walls are gaining popularity as a fun and affordable way to bring the excitement of rock climbing into your own home or backyard. Whether you’re a seasoned climber looking for a dedicated training space or a beginner eager to explore the sport, building a DIY climbing wall offers a rewarding and customizable experience.
This guide will walk you through every step of the process, from planning and designing your wall to installing climbing holds and ensuring safety. We’ll cover essential materials, tools, and techniques, providing you with the knowledge and confidence to create a climbing haven that meets your specific needs and aspirations.
Building the Structure

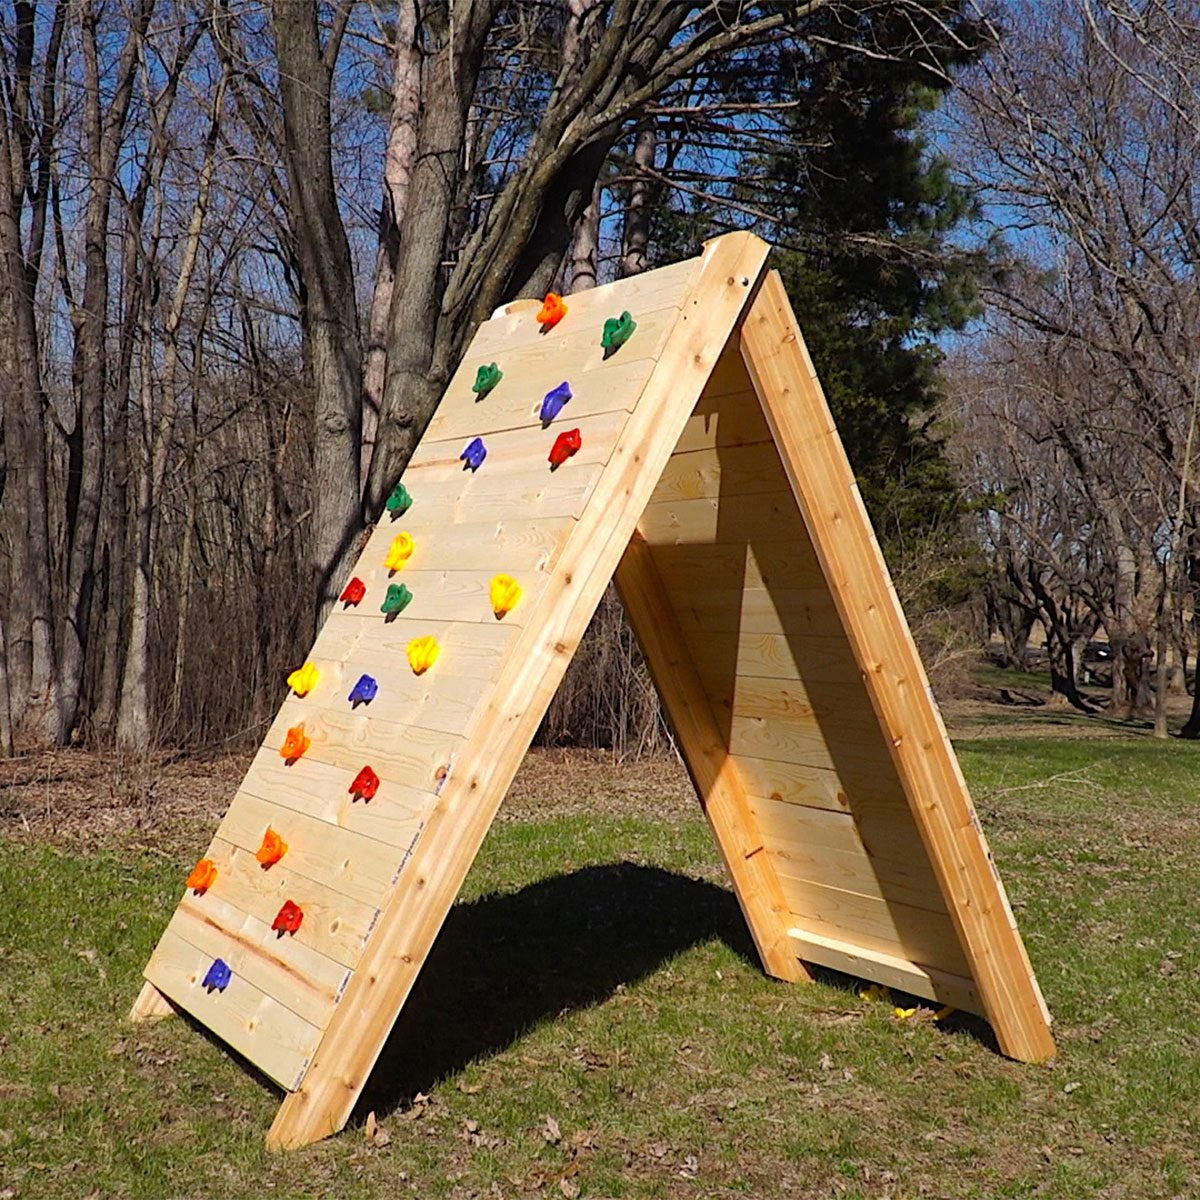
The frame of your climbing wall is the foundation of your project. It needs to be sturdy and secure to handle the weight of climbers and the forces generated by their movements. Several different methods can be used to build the frame, each with its own advantages and disadvantages.
Frame Construction Methods
There are several different materials that can be used to build a climbing wall frame, each with its own advantages and disadvantages.
- Wood: Wood is a readily available and relatively inexpensive material that is easy to work with. It is also a good choice for building a climbing wall frame because it is relatively lightweight and can be easily shaped. However, wood is susceptible to moisture damage and can be prone to warping or cracking over time. If you choose wood, use pressure-treated lumber for the base and structural components to resist rot and insect damage.
- Metal: Metal is a strong and durable material that is resistant to moisture damage and warping. It is a good choice for building a climbing wall frame if you need a structure that can withstand heavy use. However, metal can be more expensive than wood and can be more difficult to work with. Metal frames are often preferred for commercial climbing walls, but they can be heavier and require more specialized tools and skills to build.
- Concrete: Concrete is the most durable option for a climbing wall frame, but it is also the most expensive and time-consuming to build. Concrete is a good choice for a climbing wall that will be exposed to the elements or that will be used for high-intensity climbing. However, it is important to note that concrete can be difficult to work with and requires specialized equipment and skills. Concrete is typically used for outdoor climbing walls or large, permanent structures.
Safety Considerations and Building Codes
When building a climbing wall frame, it is essential to consider safety and adhere to local building codes.
- Strength and Stability: The frame must be strong enough to support the weight of climbers and the forces generated by their movements. The strength of the frame will depend on the material used, the design, and the size of the climbing wall.
- Anchoring: The frame must be securely anchored to the ground or to the wall. The anchoring method will depend on the material used and the weight of the climbing wall. This is especially important for outdoor walls that may be exposed to wind and other forces.
- Building Codes: You should consult with your local building department to ensure that your climbing wall frame meets all applicable codes and regulations. Building codes will vary depending on your location, but they are designed to ensure the safety of structures and the people who use them.
Step-by-Step Guide for Building a DIY Climbing Wall Frame
Building a climbing wall frame can be a challenging but rewarding project. This step-by-step guide will help you build a safe and sturdy frame for your climbing wall.
Step 1: Design and Planning
- Determine the size and shape of your climbing wall. Consider the space you have available and the type of climbing you want to do. A smaller wall is easier to build and requires less material, but a larger wall will offer more climbing opportunities.
- Choose the materials for your frame. Consider the factors discussed above, such as cost, availability, and strength.
- Create a detailed plan for your climbing wall frame. This plan should include the dimensions of the frame, the type of wood or metal you will use, and the anchoring method you will employ. A detailed plan will help you to purchase the correct materials and avoid costly mistakes during construction.
Step 2: Preparing the Site
- Clear the area where you will be building your climbing wall. Remove any obstacles or debris that could interfere with construction. This will make it easier to work and will help to prevent accidents.
- Prepare the ground. If you are building your climbing wall outdoors, you will need to prepare the ground to ensure that the frame is level and stable. This may involve leveling the ground or adding a layer of gravel or concrete.
Step 3: Constructing the Frame
- Cut the wood or metal to the correct dimensions. Use a saw or a metal cutter to cut the lumber or metal to the dimensions specified in your plan. Be sure to make precise cuts to ensure that the frame is square and stable.
- Assemble the frame. Use screws, bolts, or other fasteners to join the pieces of wood or metal together. Be sure to use enough fasteners to ensure that the frame is strong and stable. Refer to your plan for the specific details of the frame construction.
- Anchor the frame. Once the frame is assembled, anchor it to the ground or to the wall. The anchoring method will depend on the material used and the weight of the climbing wall. You may need to use concrete anchors, lag screws, or other fasteners to secure the frame.
Step 4: Inspect and Test
- Inspect the frame carefully. Make sure that all of the joints are secure and that the frame is level and stable. Look for any signs of weakness or damage.
- Test the frame. Before you start adding climbing holds, test the frame by applying pressure to it. This will help you to identify any potential problems. Apply pressure in different directions to simulate the forces that will be generated by climbers.
Installing the Climbing Holds: Diy Climbing Wall
Now that your climbing wall structure is complete, it’s time to install the climbing holds! This is the fun part where you get to design your routes and create a challenging and engaging climbing experience. Let’s dive into the world of climbing holds and how to install them on your DIY wall.
Types of Climbing Holds
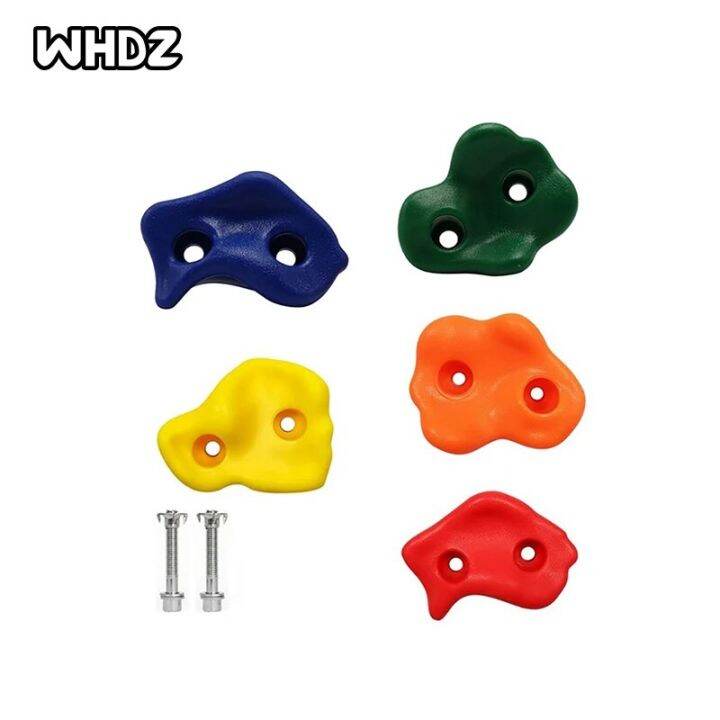
Climbing holds come in a wide variety of shapes, sizes, and materials, each offering unique challenges and features.
- Plastic holds are the most common type, offering a good balance of durability, affordability, and grip. They are available in various sizes, shapes, and colors, allowing for creative route design.
- Wood holds are known for their natural beauty and unique textures, offering a more rustic and organic feel. They are typically heavier than plastic holds and can be more expensive.
- Resin holds are a relatively new type, offering a combination of the durability of plastic with the textured grip of wood. They are often used for specialized holds like slopers and crimps, which require specific hand positions.
Installing Climbing Holds
There are several methods for installing climbing holds, each with its advantages and disadvantages.
- Screws are the most common method for attaching holds to wood structures. They are relatively inexpensive and easy to install, but they can leave visible holes on the wall.
- Glue is another option for attaching holds, especially for walls made of concrete or other non-porous materials. Glue provides a more permanent and aesthetically pleasing installation, but it can be challenging to remove holds if needed.
- Bolts are a more durable and secure option, often used for larger holds or high-traffic climbing walls. They are typically installed with a drill and require a nut on the backside of the wall.
Creating Climbing Routes
With your climbing holds installed, it’s time to start designing routes! This is where your creativity comes into play.
- Start with the basics: Create a few easy routes using large, comfortable holds, gradually increasing the difficulty as you progress.
- Vary hold types: Use a mix of different holds to create a challenging and engaging route. Incorporate slopers, crimps, and jugs to test different hand positions and muscle groups.
- Think about flow: Design routes that flow naturally, avoiding awkward transitions and sudden changes in difficulty.
- Create a variety of challenges: Offer routes for different skill levels, from beginner to advanced.
Safety and Maintenance

Building a DIY climbing wall is a great way to enjoy the sport of climbing at home. However, safety should always be the top priority when climbing, especially on a DIY wall. Taking proper safety precautions and maintaining your wall regularly will help ensure that you and your climbing partners can enjoy your wall for years to come.
Safety Precautions, Diy climbing wall
It is essential to use proper safety equipment and follow safe climbing practices when using your DIY climbing wall.
- Harness: A climbing harness is a crucial piece of safety equipment that secures you to the rope. Choose a harness that fits comfortably and securely, and make sure it is properly adjusted before climbing.
- Belay Device: A belay device is used to control the rope and prevent falls. It should be used by a competent belayer who understands how to use it properly. There are various types of belay devices, each with its own advantages and disadvantages. Choose a device that you are comfortable using and that is appropriate for your climbing style.
- Rope: The rope you use should be appropriate for climbing and should be inspected regularly for wear and tear. Choose a rope that is the right length for your wall and climbing style.
- Chalk Bag: A chalk bag is used to improve your grip on the holds. Choose a chalk bag that is easy to access and that has a comfortable strap.
- Helmet: A helmet is recommended for all climbers, especially when climbing indoors or in areas where there is a risk of falling objects.
Inspecting and Maintaining Your DIY Climbing Wall
Regular inspection and maintenance are essential for ensuring the safety and longevity of your DIY climbing wall.
- Inspect the Wall Regularly: Check for loose or damaged holds, cracked or chipped plywood, and loose or broken bolts. If you find any problems, address them immediately.
- Check the Anchors: The anchors that secure the holds to the wall should be inspected regularly. Make sure they are securely attached to the wall and that they are not showing signs of wear or damage.
- Inspect the Rope: Inspect the rope for any signs of wear or damage. Look for frayed or cut fibers, broken strands, or any other damage. If you find any problems, retire the rope and replace it with a new one.
- Keep the Wall Clean: Clean the wall regularly to remove dirt, dust, and debris. This will help to prevent slipping and falls.
Finding Certified Climbing Wall Inspectors
It is highly recommended to have your DIY climbing wall inspected by a certified climbing wall inspector. A certified inspector can identify potential safety hazards and ensure that your wall meets industry standards. You can find certified climbing wall inspectors through the American Alpine Club (AAC) or the Climbing Wall Association (CWA).
Advanced DIY Climbing Wall Features
A basic DIY climbing wall can provide a fun and challenging workout. However, adding advanced features can enhance your climbing experience and provide more training options. This section explores some of the advanced features you can consider integrating into your DIY climbing wall.
Auto Belay Systems
Auto belay systems are a valuable safety feature that can significantly enhance your climbing experience. These systems automatically lower you to the ground if you fall, eliminating the need for a belayer. Auto belay systems use a braking mechanism that engages when you fall, preventing you from free-falling. They typically consist of a device mounted at the top of the wall, a tether attached to your harness, and a control panel.
- Types of Auto Belay Systems: There are two primary types of auto belay systems:
- Retractible: These systems use a retractable rope that is wound around a drum. When you fall, the rope is automatically released, lowering you to the ground.
- Friction-based: These systems use friction to slow your descent. When you fall, the tether slides through a friction device, slowing your descent.
- Integrating Auto Belay Systems: Integrating an auto belay system into your DIY climbing wall requires careful planning and installation. The system must be securely mounted to the wall, and the tether must be properly connected to your harness. It is crucial to follow the manufacturer’s instructions and consult with a qualified professional for installation.
- Benefits of Auto Belay Systems:
- Safety: Auto belay systems provide a crucial safety net, ensuring a controlled descent in case of a fall.
- Independence: They allow you to climb solo without the need for a belayer.
- Convenience: They eliminate the need for a belayer, making climbing more accessible and convenient.
- Considerations:
- Cost: Auto belay systems can be expensive, ranging from several hundred to thousands of dollars.
- Space: They require sufficient space for installation and operation.
- Maintenance: Regular maintenance is essential to ensure proper functioning and safety.
Training Boards
Training boards are specialized climbing structures designed to improve specific climbing skills, such as finger strength, technique, and endurance. These boards typically feature a variety of holds and angles that challenge your muscles and movements.
- Types of Training Boards:
- Hangboards: These boards feature a series of holds designed for finger strength training.
- Campus Boards: These boards are designed for dynamic movement training, featuring holds that require jumping and leaping.
- Moon Boards: These boards offer a variety of hold configurations, encouraging creativity and problem-solving.
- Integrating Training Boards: Training boards can be incorporated into your DIY climbing wall by mounting them directly to the wall or creating a separate freestanding structure. You can choose a training board that complements your existing wall’s design and your training goals.
- Benefits of Training Boards:
- Specific Skill Development: Training boards allow you to focus on specific climbing skills, such as finger strength, technique, or endurance.
- Injury Prevention: They can help strengthen your muscles and improve your technique, reducing the risk of injury.
- Variety: They provide a different type of challenge compared to a standard climbing wall, keeping your training interesting.
- Considerations:
- Space: Training boards require dedicated space for installation and use.
- Safety: Proper training board use is essential to avoid injuries. It is crucial to start slowly and gradually increase the difficulty.
- Cost: Training boards can range in price, depending on the type and features.
Adjustable Holds
Adjustable holds allow you to customize your climbing wall by changing the difficulty and route configurations. These holds can be mounted and adjusted on the wall, allowing you to create new challenges and adapt to your progress.
- Types of Adjustable Holds:
- Screw-on Holds: These holds are attached to the wall using screws, allowing for easy adjustment and replacement.
- Magnetic Holds: These holds use magnets to attach to the wall, providing a secure and adjustable mounting system.
- Integrating Adjustable Holds: Adjustable holds can be integrated into your DIY climbing wall by using specialized mounting systems or attaching them to a pre-existing hold system. You can choose adjustable holds that match the style and size of your existing holds.
- Benefits of Adjustable Holds:
- Customization: Adjustable holds allow you to change the difficulty and route configurations, keeping your climbing experience fresh and challenging.
- Progression: You can gradually increase the difficulty of your climbs by adding more challenging holds.
- Versatility: They provide versatility in route setting and allow you to create different types of climbing experiences.
- Considerations:
- Cost: Adjustable holds can be more expensive than standard holds.
- Compatibility: Ensure the adjustable holds are compatible with your existing mounting system.
- Safety: Properly installing and maintaining adjustable holds is essential for safety.
Conclusion
Building your own climbing wall is a rewarding and challenging project that can bring the thrill of climbing right into your backyard or home. From planning the structure to installing the holds, every step offers a chance to customize your climbing experience.
Key Takeaways
This guide has provided a comprehensive overview of the process of constructing a DIY climbing wall. We have explored the essential steps involved, including:
- Planning and Design: Defining your goals, considering space limitations, and selecting the right materials are crucial for a successful project.
- Building the Structure: Creating a sturdy and safe framework using wood, metal, or concrete is essential for a reliable climbing wall.
- Installing Climbing Holds: Choosing the right holds, considering their size, shape, and difficulty, is key to a varied and engaging climbing experience.
- Safety and Maintenance: Implementing safety measures like proper anchoring, regular inspections, and appropriate padding are paramount to prevent injuries.
- Advanced DIY Climbing Wall Features: Exploring options like adjustable holds, angled walls, and training features can enhance the functionality and challenge of your climbing wall.
End of Discussion
Building a DIY climbing wall is a journey that combines creativity, resourcefulness, and a passion for climbing. With careful planning, attention to detail, and a touch of DIY spirit, you can transform your space into a personal climbing paradise. So, gather your tools, unleash your inner builder, and get ready to experience the thrill of climbing on your very own creation.
Building a DIY climbing wall is a fantastic project that combines physical activity with creativity. It’s also a great opportunity to create a unique and personalized DIY gift for a friend or family member who enjoys climbing. With some planning and effort, you can construct a sturdy and fun climbing wall that will provide hours of entertainment and exercise.


