Homemade chalk paint is a versatile and affordable way to transform surfaces with a vintage, matte finish. This DIY project allows you to personalize your home decor, furniture restoration, and art projects with unique colors and textures.
Unlike commercially available chalk paint, homemade versions offer a greater degree of control over ingredients and consistency, enabling you to achieve specific effects for different applications. This guide delves into the history, ingredients, mixing techniques, application methods, and creative possibilities of homemade chalk paint.
Ingredients and Materials

Homemade chalk paint is a versatile and affordable alternative to commercially available paint. It can be used on various surfaces, including furniture, walls, and crafts, providing a unique matte finish and a vintage look.
Ingredients and Their Functions
The ingredients used in homemade chalk paint play a crucial role in achieving the desired texture and finish. Here’s a breakdown of the essential ingredients and their functions:
- Acrylic Paint: This forms the base of the paint and provides the color. It is available in a wide range of colors, allowing you to customize your paint. Acrylic paint dries quickly and is water-resistant, making it suitable for various surfaces.
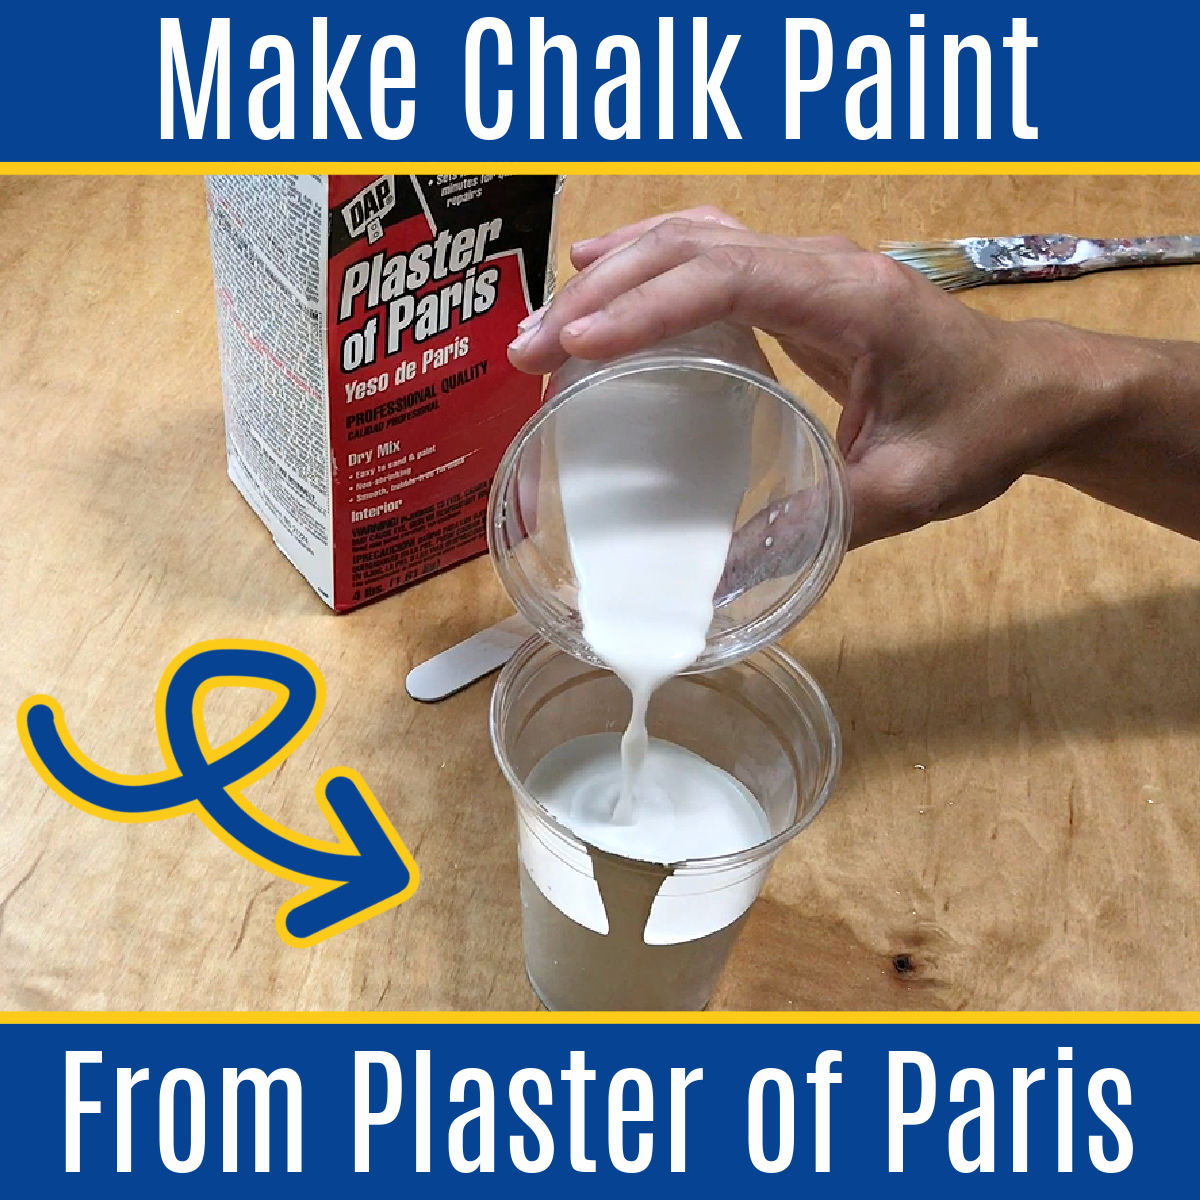
- Plaster of Paris: This ingredient adds texture and creates the chalky finish. It binds with the acrylic paint, providing a smooth and durable surface.
- Water: Water acts as a diluent, adjusting the consistency of the paint. It also helps to activate the plaster of Paris, allowing it to bind with the paint.
Ingredient Quantities and Potential Substitutes
Here is a table outlining the typical quantities of ingredients used in homemade chalk paint and potential substitutes:
| Ingredient | Quantity | Potential Substitutes |
|---|---|---|
| Acrylic Paint | 1 cup | Latex paint, but note that it may not provide the same chalky finish |
| Plaster of Paris | 1/4 cup | Calcium carbonate (chalk powder) |
| Water | As needed for desired consistency | None |
Mixing and Preparation
Mixing homemade chalk paint is a straightforward process that allows you to customize the consistency and color to suit your needs. Achieving the right consistency is crucial for a smooth and even finish. This section Artikels the steps involved in mixing homemade chalk paint and explains the different techniques for achieving desired paint consistencies.
Mixing Homemade Chalk Paint
The process of mixing homemade chalk paint is simple and involves combining the ingredients in a specific order. It’s important to follow the steps carefully to ensure a smooth and consistent paint.
- Combine Dry Ingredients: In a large bowl, mix together the dry ingredients: plaster of paris, calcium carbonate, and powdered pigment. The ratio of these ingredients can be adjusted to achieve different shades and textures.
- Add Water Gradually: Slowly add water to the dry mixture, stirring continuously until a smooth paste forms. The amount of water will determine the consistency of the paint.
- Stir Thoroughly: Continue stirring until all lumps are dissolved and the paint is smooth.
- Adjust Consistency: If the paint is too thick, add a little more water. If it’s too thin, add more dry ingredients.
Achieving Different Paint Consistencies
The consistency of homemade chalk paint can be adjusted to suit different applications. For example, a thicker consistency is ideal for painting furniture, while a thinner consistency is better for distressing or creating a more subtle finish.
- Thick Consistency: For a thick consistency, use less water and stir until the paint is smooth and creamy. This consistency is ideal for painting furniture or other surfaces that require a more substantial coating.
- Medium Consistency: For a medium consistency, use a moderate amount of water and stir until the paint is smooth and slightly runny. This consistency is suitable for most applications, including painting walls, furniture, and other surfaces.
- Thin Consistency: For a thin consistency, use more water and stir until the paint is smooth and watery. This consistency is ideal for distressing or creating a more subtle finish. It can also be used for layering or creating washes.
Importance of Proper Mixing and Storage
Proper mixing and storage are essential for maintaining the quality and consistency of homemade chalk paint.
Mixing ensures a smooth and even finish, while proper storage prevents the paint from drying out or separating.
- Thorough Mixing: Thoroughly mixing the paint ensures a smooth and even finish. It helps to eliminate any lumps or clumps that can affect the paint’s consistency and appearance.
- Airtight Storage: Store homemade chalk paint in an airtight container to prevent it from drying out or separating. It’s also important to label the container with the date and color of the paint.
Color Variations and Customization
The beauty of homemade chalk paint lies in its versatility. You can create an array of colors and shades to match your personal style and project requirements. This section explores different techniques for achieving desired color variations and customizing your paint.
Creating Different Colors and Shades
You can achieve a wide spectrum of colors by mixing different pigments. Start with a base color, such as white or black, and gradually add small amounts of other pigments to achieve the desired hue. For instance, adding a small amount of red to white will create a light pink shade, while adding more red will create a deeper pink. You can also use multiple pigments to create complex shades, like mixing red, yellow, and blue to create a variety of browns and greens.
Achieving Specific Color Effects
Ombre
Ombre, meaning “shaded” in French, creates a gradual transition of color from dark to light or vice versa. This effect is achieved by layering different shades of the same color.
– Begin by applying the darkest shade of your chosen color to the bottom portion of your project.
– Gradually blend in lighter shades as you move upwards.
– Use a brush or sponge to create a seamless transition between shades.
– You can use multiple shades for a more dramatic ombre effect.
Marbling
Marbling is a technique that mimics the appearance of natural marble. It creates a unique and visually appealing finish.
– Start with a base coat of a solid color.
– Dip a sponge or brush into a contrasting color and dab it randomly on the surface.
– Use a thin brush to create swirling patterns and veins.
– For a more realistic marble effect, add a layer of white paint to create highlights.
Color Palettes for Different Styles
Choosing the right color palette is crucial for achieving a cohesive look in your project. Here are some examples of color palettes suitable for different styles:
Modern
– White
– Black
– Grey
– Metallic accents (gold, silver)
Rustic
– Earthy tones (brown, beige, green)
– Natural wood tones
– Distressed finishes
Bohemian
– Bright and bold colors (blue, green, orange)
– Patterned fabrics
– Natural elements (wood, jute)
Coastal
– Blue and green hues
– White
– Natural wood tones
Farmhouse
– Neutral colors (white, cream, grey)
– Light blues and greens
– Rustic accents (wood, metal)
Finishing Touches
Once your chalk paint has dried, it’s time to add the finishing touches. This step not only enhances the look of your project but also provides protection and durability. There are several popular techniques to consider, each offering unique benefits.
Waxing
Waxing adds a beautiful sheen and depth to your chalk paint finish, enhancing the color and texture. Wax also provides a protective layer, making the surface more resistant to scratches and water damage.
There are two main types of wax used with chalk paint:
- Clear wax: A transparent wax that enhances the natural color and texture of the paint. It’s often used for a subtle, matte finish.
- Dark wax: A tinted wax that adds depth and dimension to your project. It’s commonly used to create a distressed or antique look.
Applying Wax
- Prepare the surface: Ensure your chalk paint is completely dry. Dust off any loose particles.
- Apply the wax: Use a clean, lint-free cloth or a wax brush to apply the wax in thin, even layers. Work in small sections, applying the wax in a circular motion.
- Buff the wax: Once the wax has dried (usually 15-20 minutes), buff it with a clean cloth to achieve a smooth, polished finish.
Sealing
Sealing your chalk paint project is essential for protecting it from wear and tear. A sealant acts as a barrier, preventing water, stains, and scratches from damaging the surface.
Types of Sealants
- Polyurethane: A durable, water-based sealant that offers excellent protection against scratches and stains. It’s available in matte, satin, and gloss finishes.
- Acrylic sealant: A versatile sealant that provides good protection and is easy to apply. It’s often used for indoor projects, as it’s not as durable as polyurethane for outdoor use.
Applying Sealant
- Prepare the surface: Ensure your chalk paint is completely dry. Dust off any loose particles.
- Apply the sealant: Use a brush, roller, or spray to apply the sealant in thin, even coats. Follow the manufacturer’s instructions for drying time.
- Apply additional coats: For extra protection, you can apply a second coat of sealant after the first coat has dried completely.
Distressing
Distressing is a technique used to give your chalk paint project an aged or vintage look. It involves creating intentional scratches, chips, and abrasions on the surface.
Distressing Techniques
- Sandpaper: Use fine-grit sandpaper to gently rub the surface in areas where you want to create wear and tear.
- Wire brush: A wire brush can be used to create deeper scratches and a more rustic look.
- Hammer: Tap the surface lightly with a hammer to create small dents and chips. Use a cloth or piece of paper to protect the surrounding area.
Distressing Tips
- Work in small sections: Don’t try to distress the entire surface at once. Focus on areas where you want to create the most wear and tear.
- Use different techniques: Combine different distressing techniques to create a more authentic look.
- Distress after sealing: If you’re using a sealant, distress the surface after it has dried completely.
Safety and Precautions: Homemade Chalk Paint
While creating your own chalk paint is a fun and rewarding experience, it’s important to prioritize safety throughout the process. Working with any paint requires careful consideration, and homemade chalk paint is no exception. By understanding potential hazards and implementing appropriate precautions, you can ensure a safe and enjoyable crafting experience.
Safety Precautions, Homemade chalk paint
Always prioritize safety when working with any paint, including homemade chalk paint. This involves taking necessary precautions to protect yourself and your surroundings.
- Proper Ventilation: Adequate ventilation is crucial when working with paint. Open windows and doors to allow fresh air circulation. This helps to dissipate paint fumes and minimize the risk of inhaling harmful chemicals. If you’re working in a confined space, consider using a respirator or face mask.
- Protective Gear: Wear appropriate protective gear, such as gloves, a mask, and eye protection, to shield yourself from potential skin or eye irritation caused by paint ingredients. Gloves protect your hands from contact with the paint, while a mask helps prevent inhalation of fumes. Eye protection safeguards your eyes from splashes or dust particles.
- Safe Storage: Store your paint and ingredients in a well-ventilated area, away from direct sunlight and heat sources. This helps to prevent paint from spoiling or becoming flammable. Keep containers tightly sealed to prevent spills and evaporation.
- Child and Pet Safety: Keep paint and paint supplies out of reach of children and pets. This is essential to prevent accidental ingestion or contact with harmful ingredients.
Potential Hazards
While homemade chalk paint is generally safe when used correctly, it’s essential to be aware of potential hazards.
- Paint Ingredients: The ingredients used in homemade chalk paint, such as plaster of paris, can cause skin irritation or respiratory problems if not handled properly. Always read the safety information on product labels and follow recommended guidelines for handling and use.
- Fumes: Paint fumes can be irritating to the respiratory system. Ensure adequate ventilation when working with paint and avoid prolonged exposure to fumes. If you experience any symptoms of discomfort, such as headaches, dizziness, or nausea, immediately move to fresh air.
- Spills and Clean-Up: Spills can occur during the paint mixing and application process. Be prepared to clean up spills promptly and safely. Wear gloves and eye protection while cleaning up spills.
Safe Disposal
Proper disposal of leftover paint and paint supplies is crucial for environmental protection.
- Paint Disposal: Check local regulations for paint disposal. In many areas, paint can be disposed of at designated hazardous waste collection centers. Avoid pouring paint down drains or into the environment, as it can contaminate water sources.
- Container Disposal: Rinse paint containers thoroughly with water and allow them to dry completely before discarding them in the recycling bin.
Conclusion
Creating your own chalk paint is a rewarding experience that allows you to customize colors, save money, and unleash your creativity. It’s a versatile paint that can transform furniture, walls, and even crafts, offering a unique, matte finish with a vintage charm.
Benefits of Homemade Chalk Paint
The benefits of making your own chalk paint are numerous. You can create custom colors that perfectly match your décor, save money compared to purchasing pre-made chalk paint, and have complete control over the ingredients and quality. Furthermore, homemade chalk paint is environmentally friendly, using readily available materials and minimizing waste.
Experimenting with Techniques and Applications
Don’t be afraid to experiment with different techniques and applications. Try using stencils, sponges, or brushes to create unique patterns and textures. You can even layer different colors to achieve a distressed look or a vintage feel.
Resources for Inspiration
There are countless resources available online and in libraries that can provide inspiration for your chalk paint projects. Websites, blogs, and social media platforms showcase stunning examples of furniture makeovers, wall art, and craft projects using homemade chalk paint.
Ending Remarks
With a little effort and creativity, you can create stunning results with homemade chalk paint. Whether you’re a seasoned DIY enthusiast or a beginner, this guide empowers you to explore the world of chalk paint and unleash your artistic potential. Experiment with colors, techniques, and finishes to bring your unique vision to life.
Homemade chalk paint is a great way to give old furniture a fresh look, and it’s surprisingly easy to make. If you’re looking for a way to improve the acoustics in your home, you might want to check out these diy bass traps , which can help absorb unwanted sound frequencies.
Once you’ve finished your DIY projects, you can use your homemade chalk paint to give your new bass traps a stylish finish!


